Frog Fantasies, Amphibian Dreams

I grew up in New York City, so all of my childhood dreams involved being in nature and discovering/catching small wild animals for pets. I remember once a naturalist on a field trip told us that salamanders and newts can be found under fallen logs. I turned over *every* log I saw after that. Flash forward 30 years to parenthood, living in Berkeley, turning over a stump in our yard and finding a SALAMANDER! Suffice it to say I was way more excited than my children.

When we moved in to our house there was a lily pond with gold fish in our garden. With three children to care for and no gardening experience, I had no idea what to do with it. The goldfish passed on(I never saw a corpse so I’m blaming raccoons), and I started dreaming of having a frog pond instead. Because frogs and salamanders in the yard? My parenting work would be done.

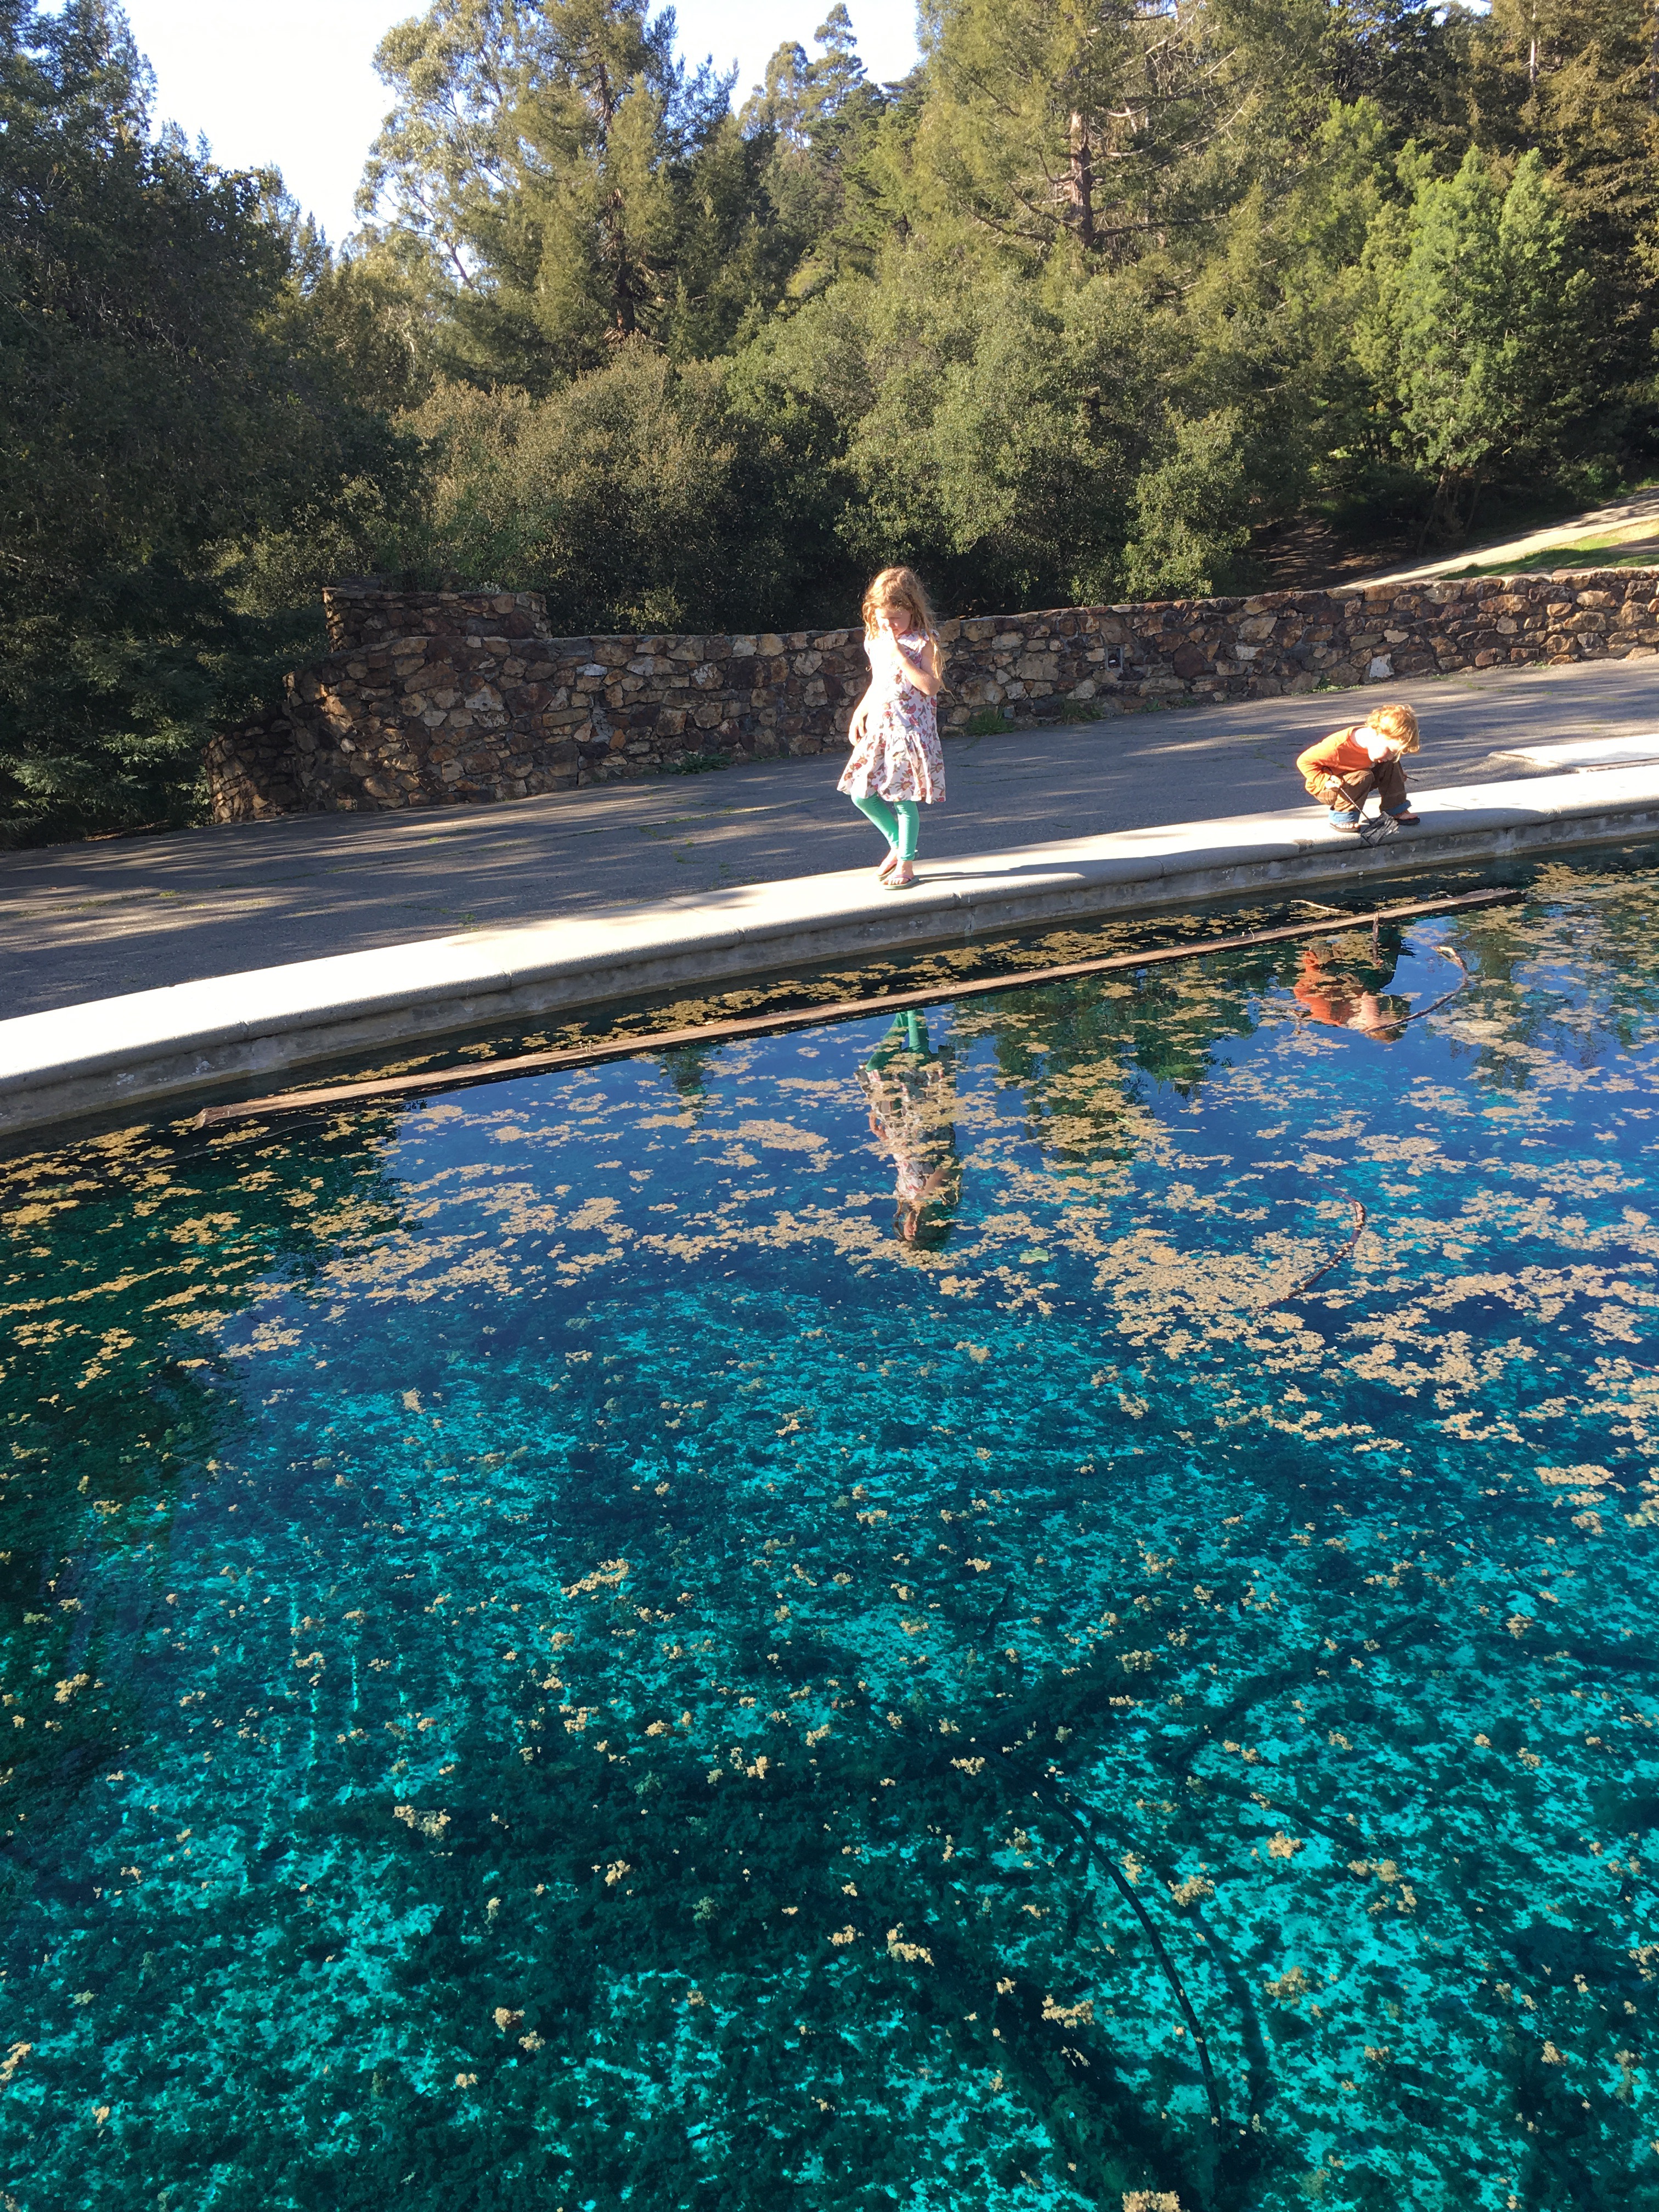
So last year when a friend told us about a neglected reflecting pool in a nearby park that had become a home to frogs and tadpoles, the kids and I went to take a look. We captured a bunch of tiny frogs, polliwogs and tadpoles, acclimated them to the water in our pond and set them free. We saw them for a week or two, then nothing! But I had faith they would return in the spring. And just a few days ago we heard it- nocturnal amphibian music coming from the yard- a frog came back! So of course we had to visit the reflecting pool and bring him some friends.  


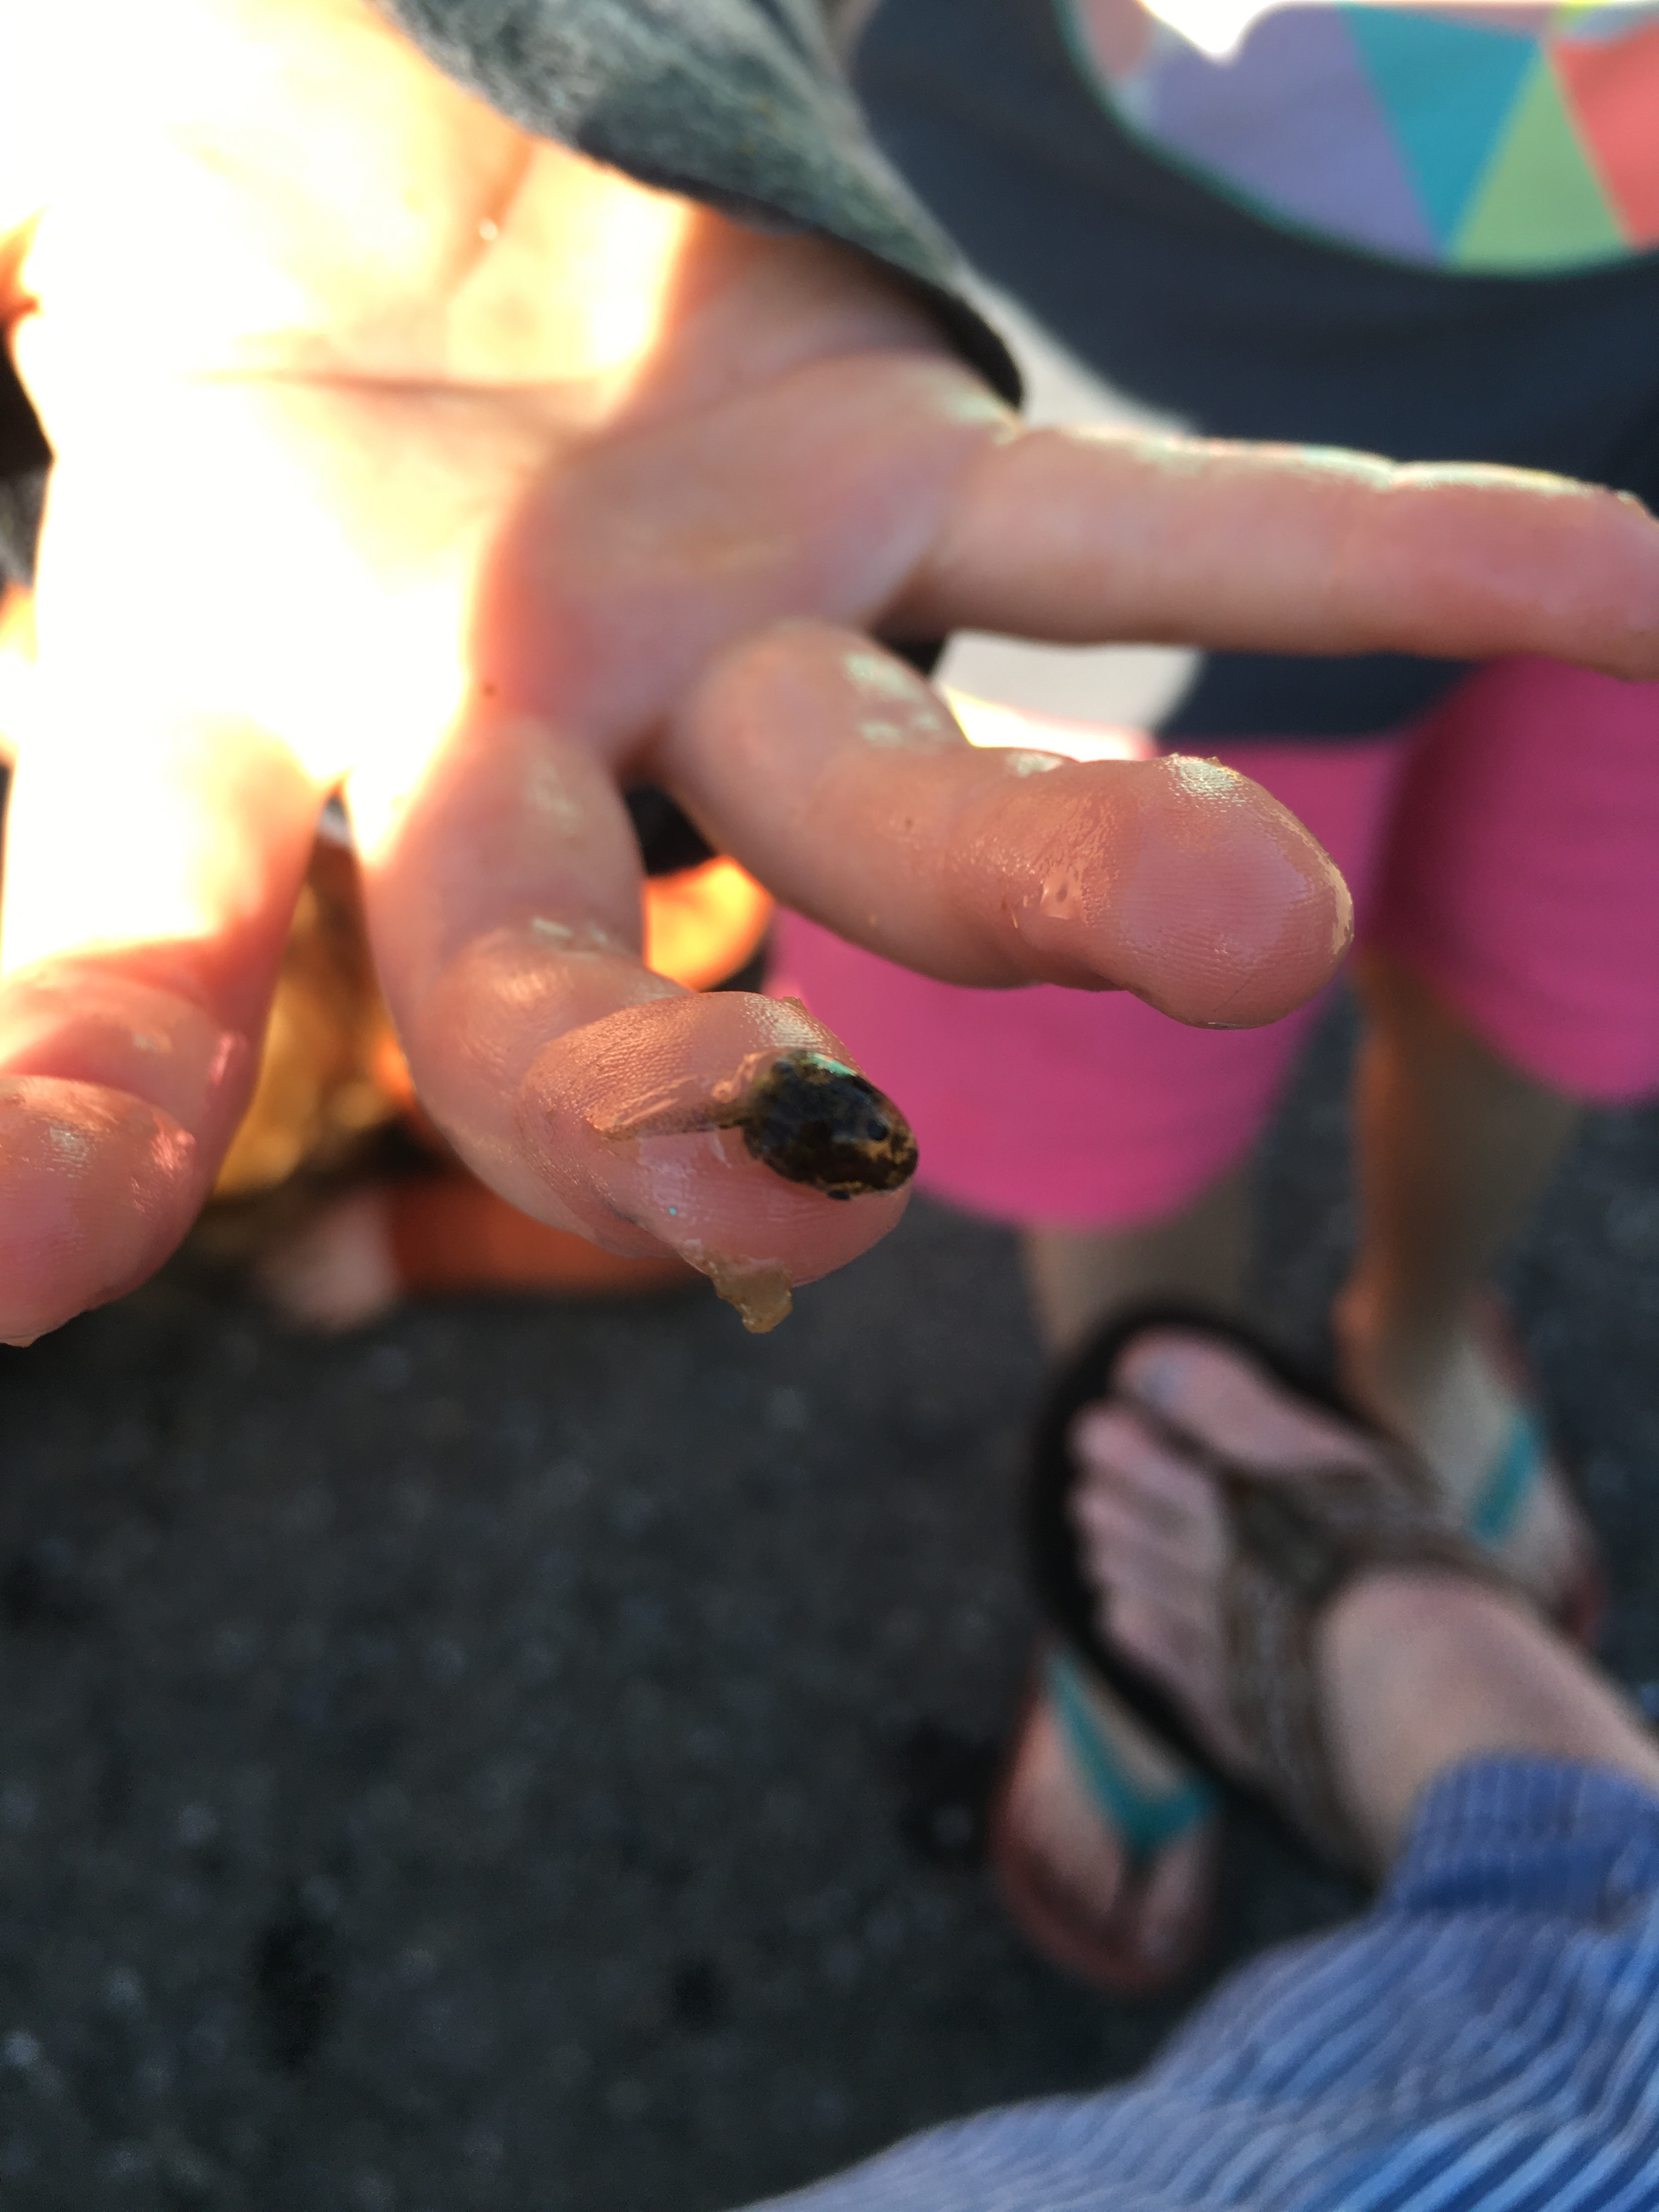
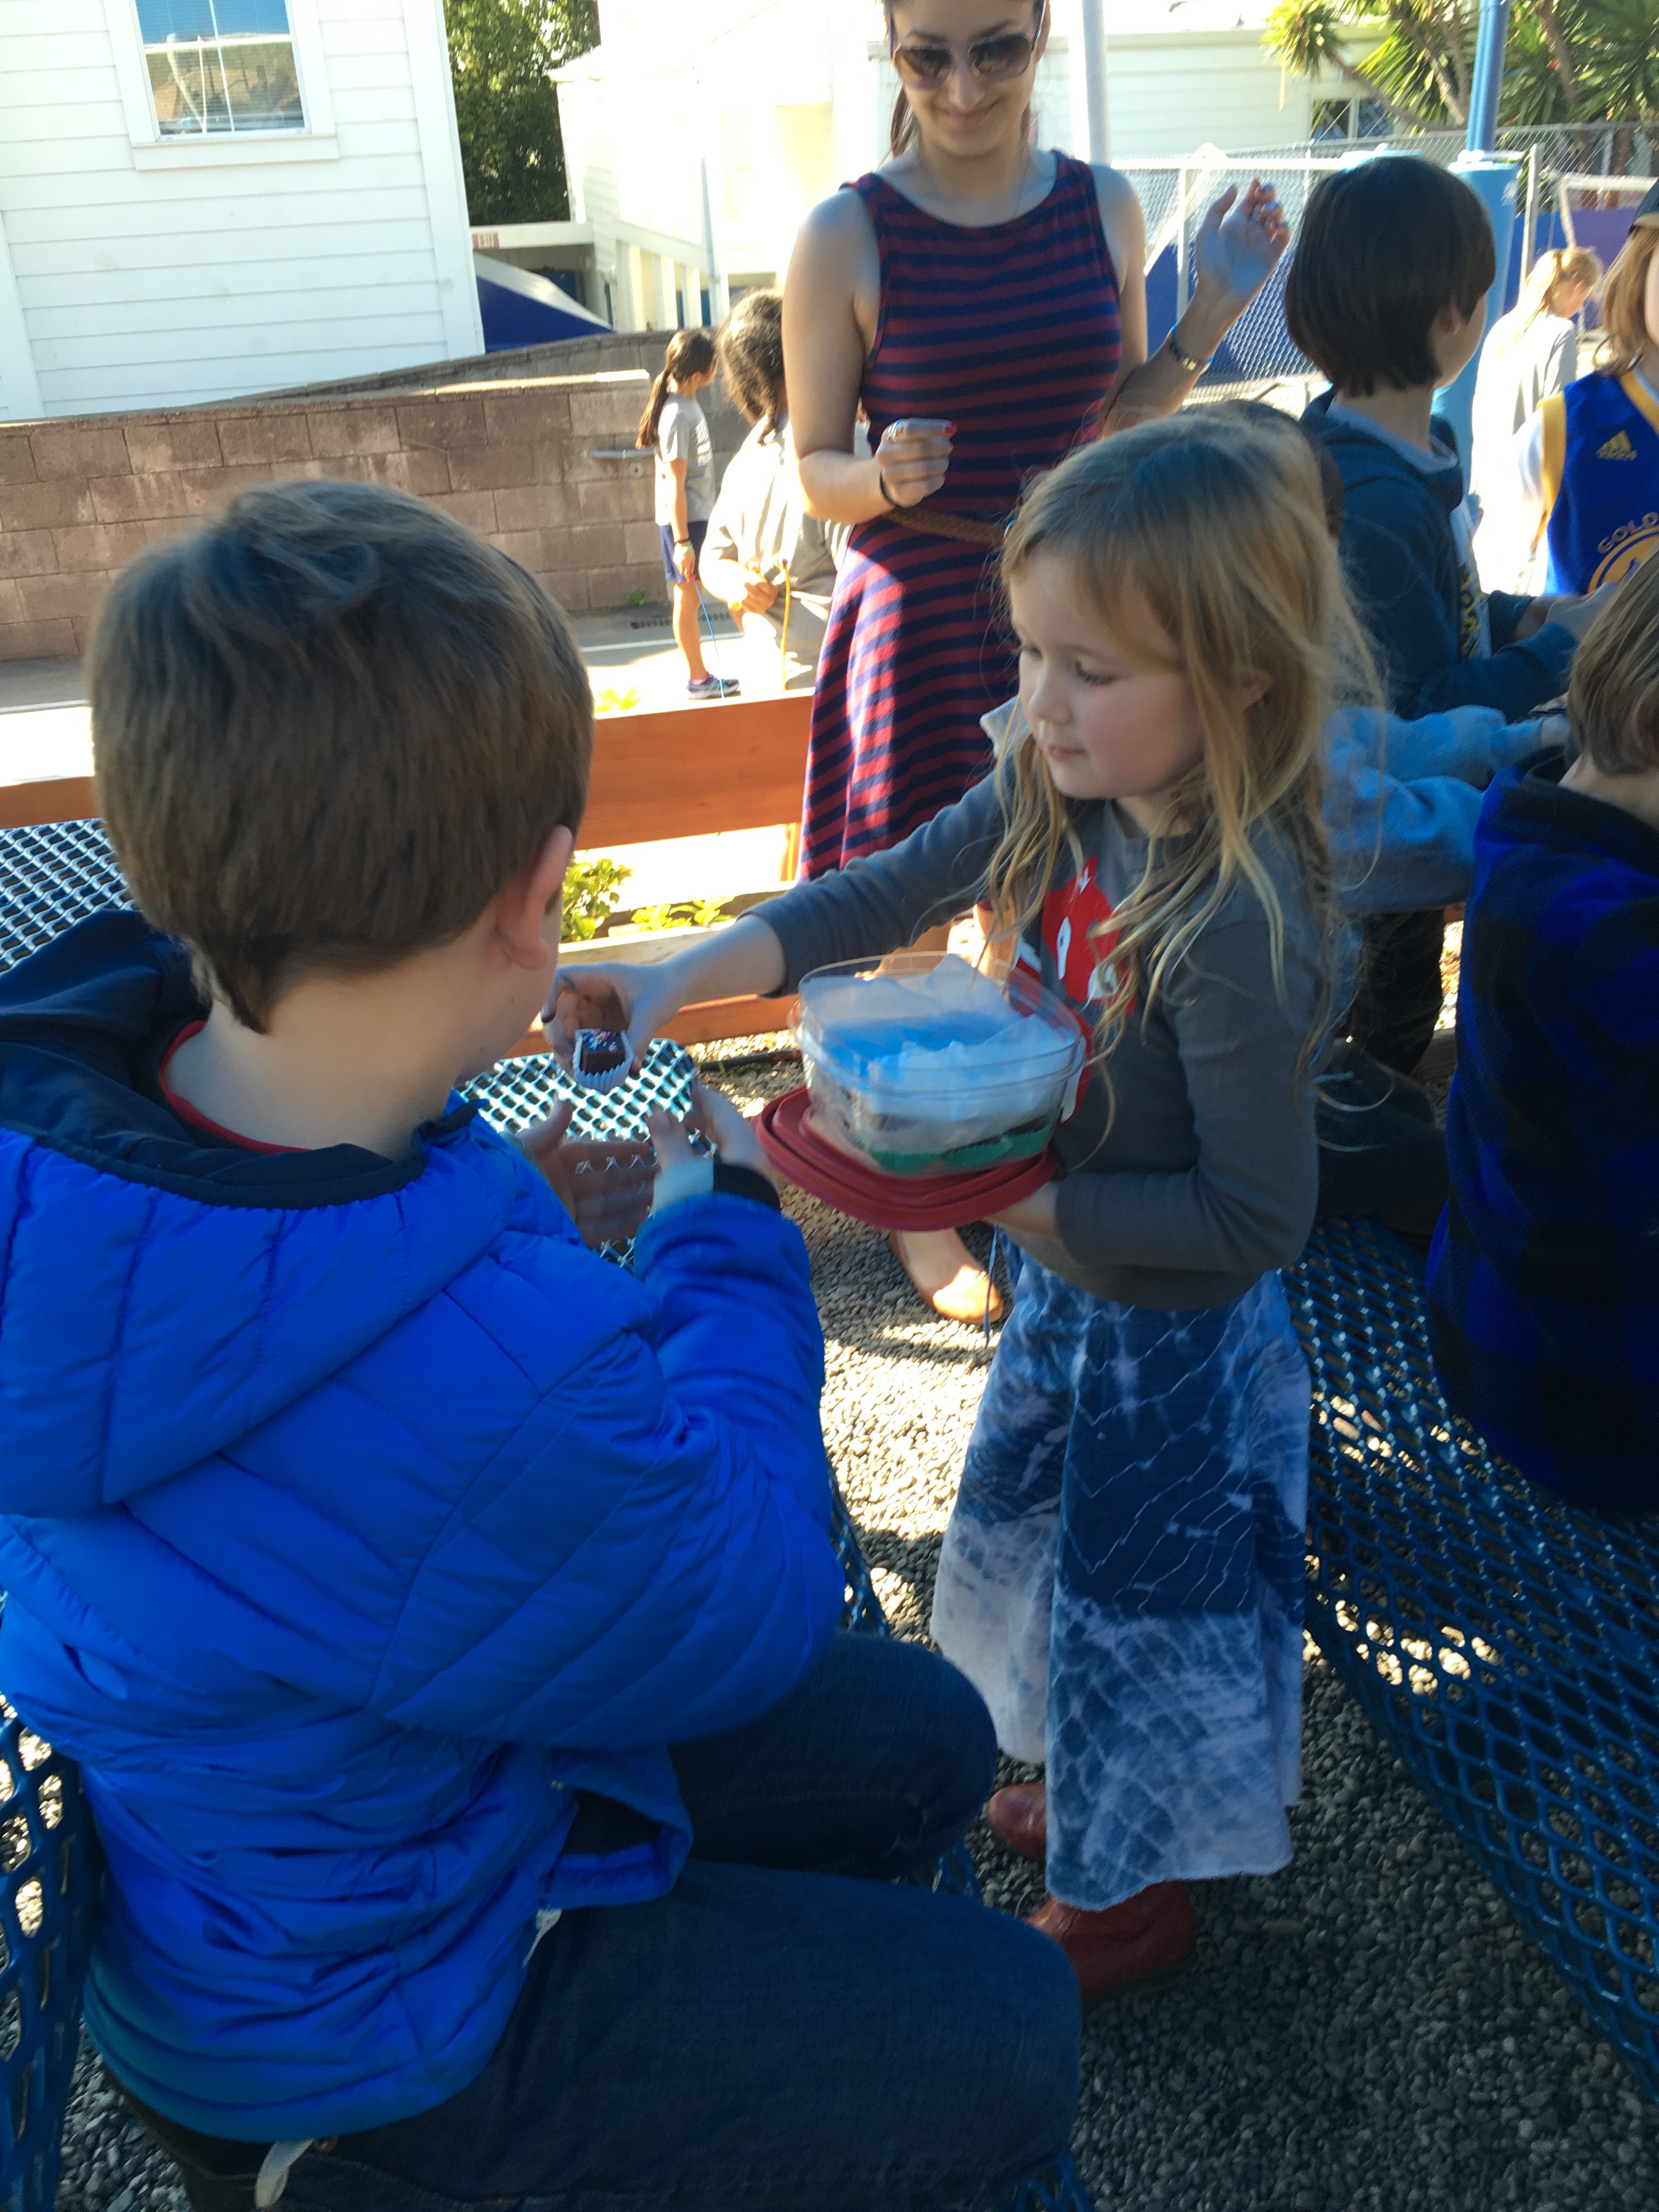
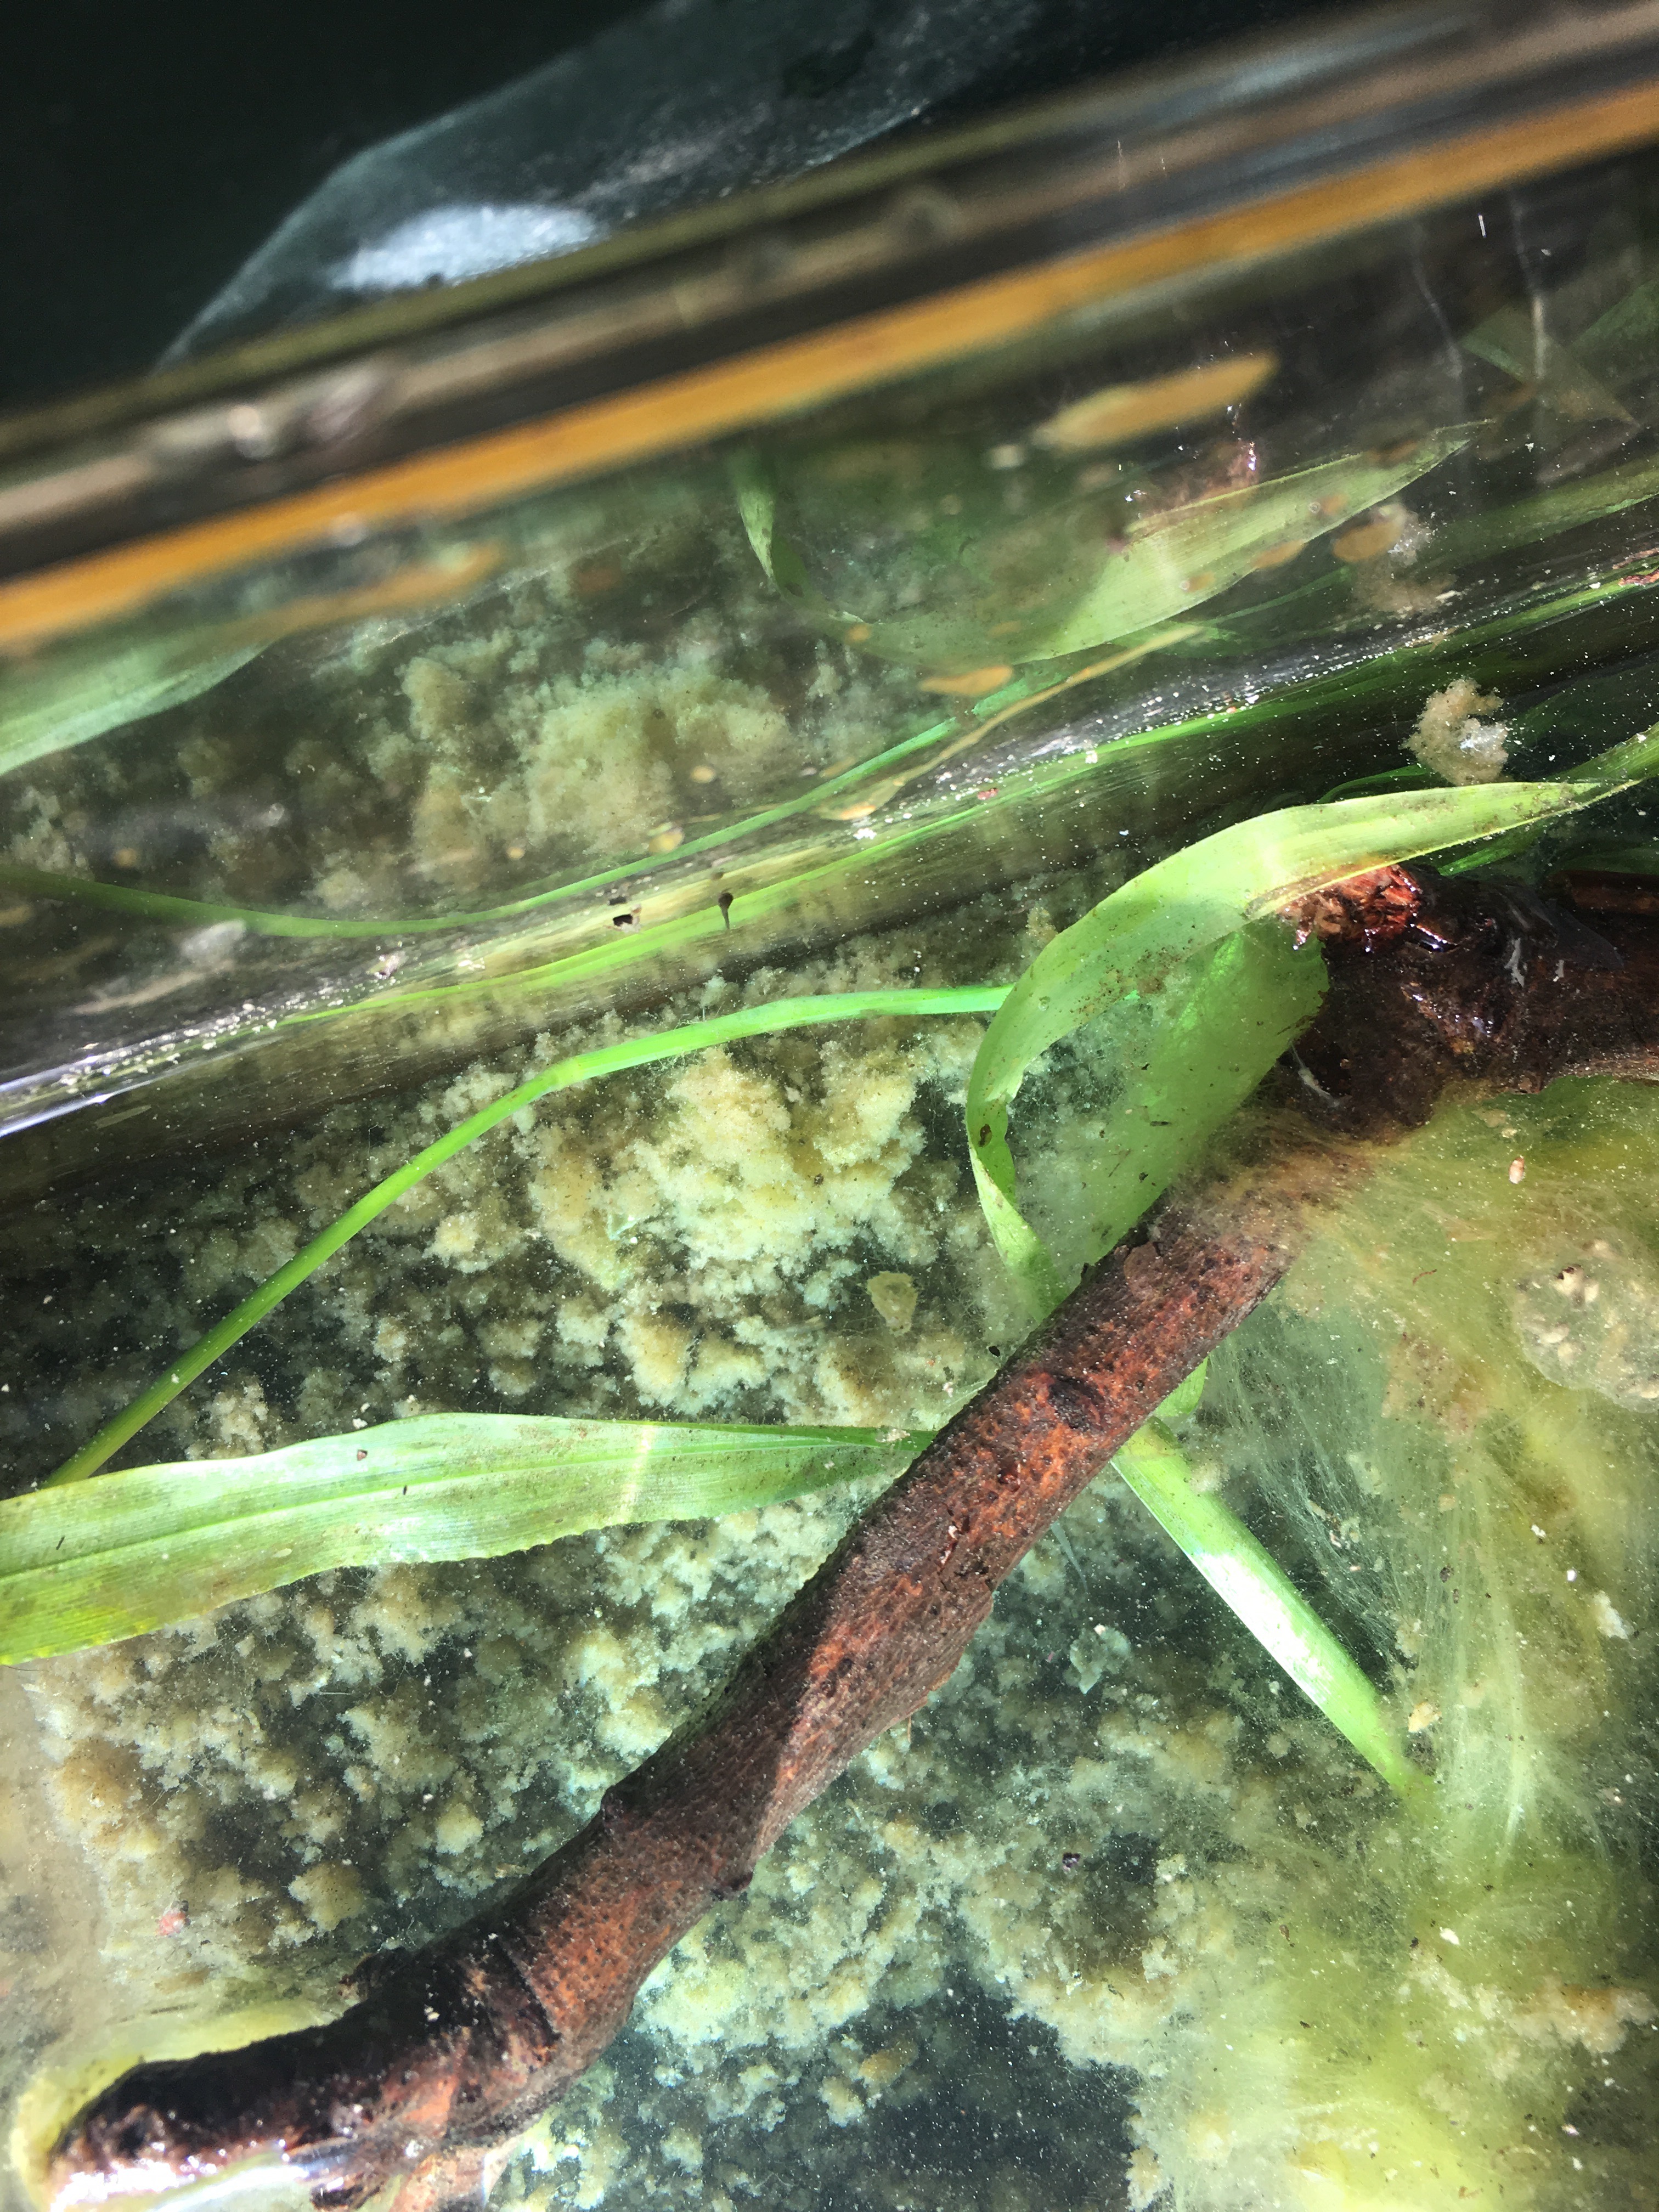
 What’s amazing this year is that we went early enough to bring home the beginning of the life cycle in our little plastic carrier- eggs, tiny tadpoles, slightly larger ones and one mature frog.  

      
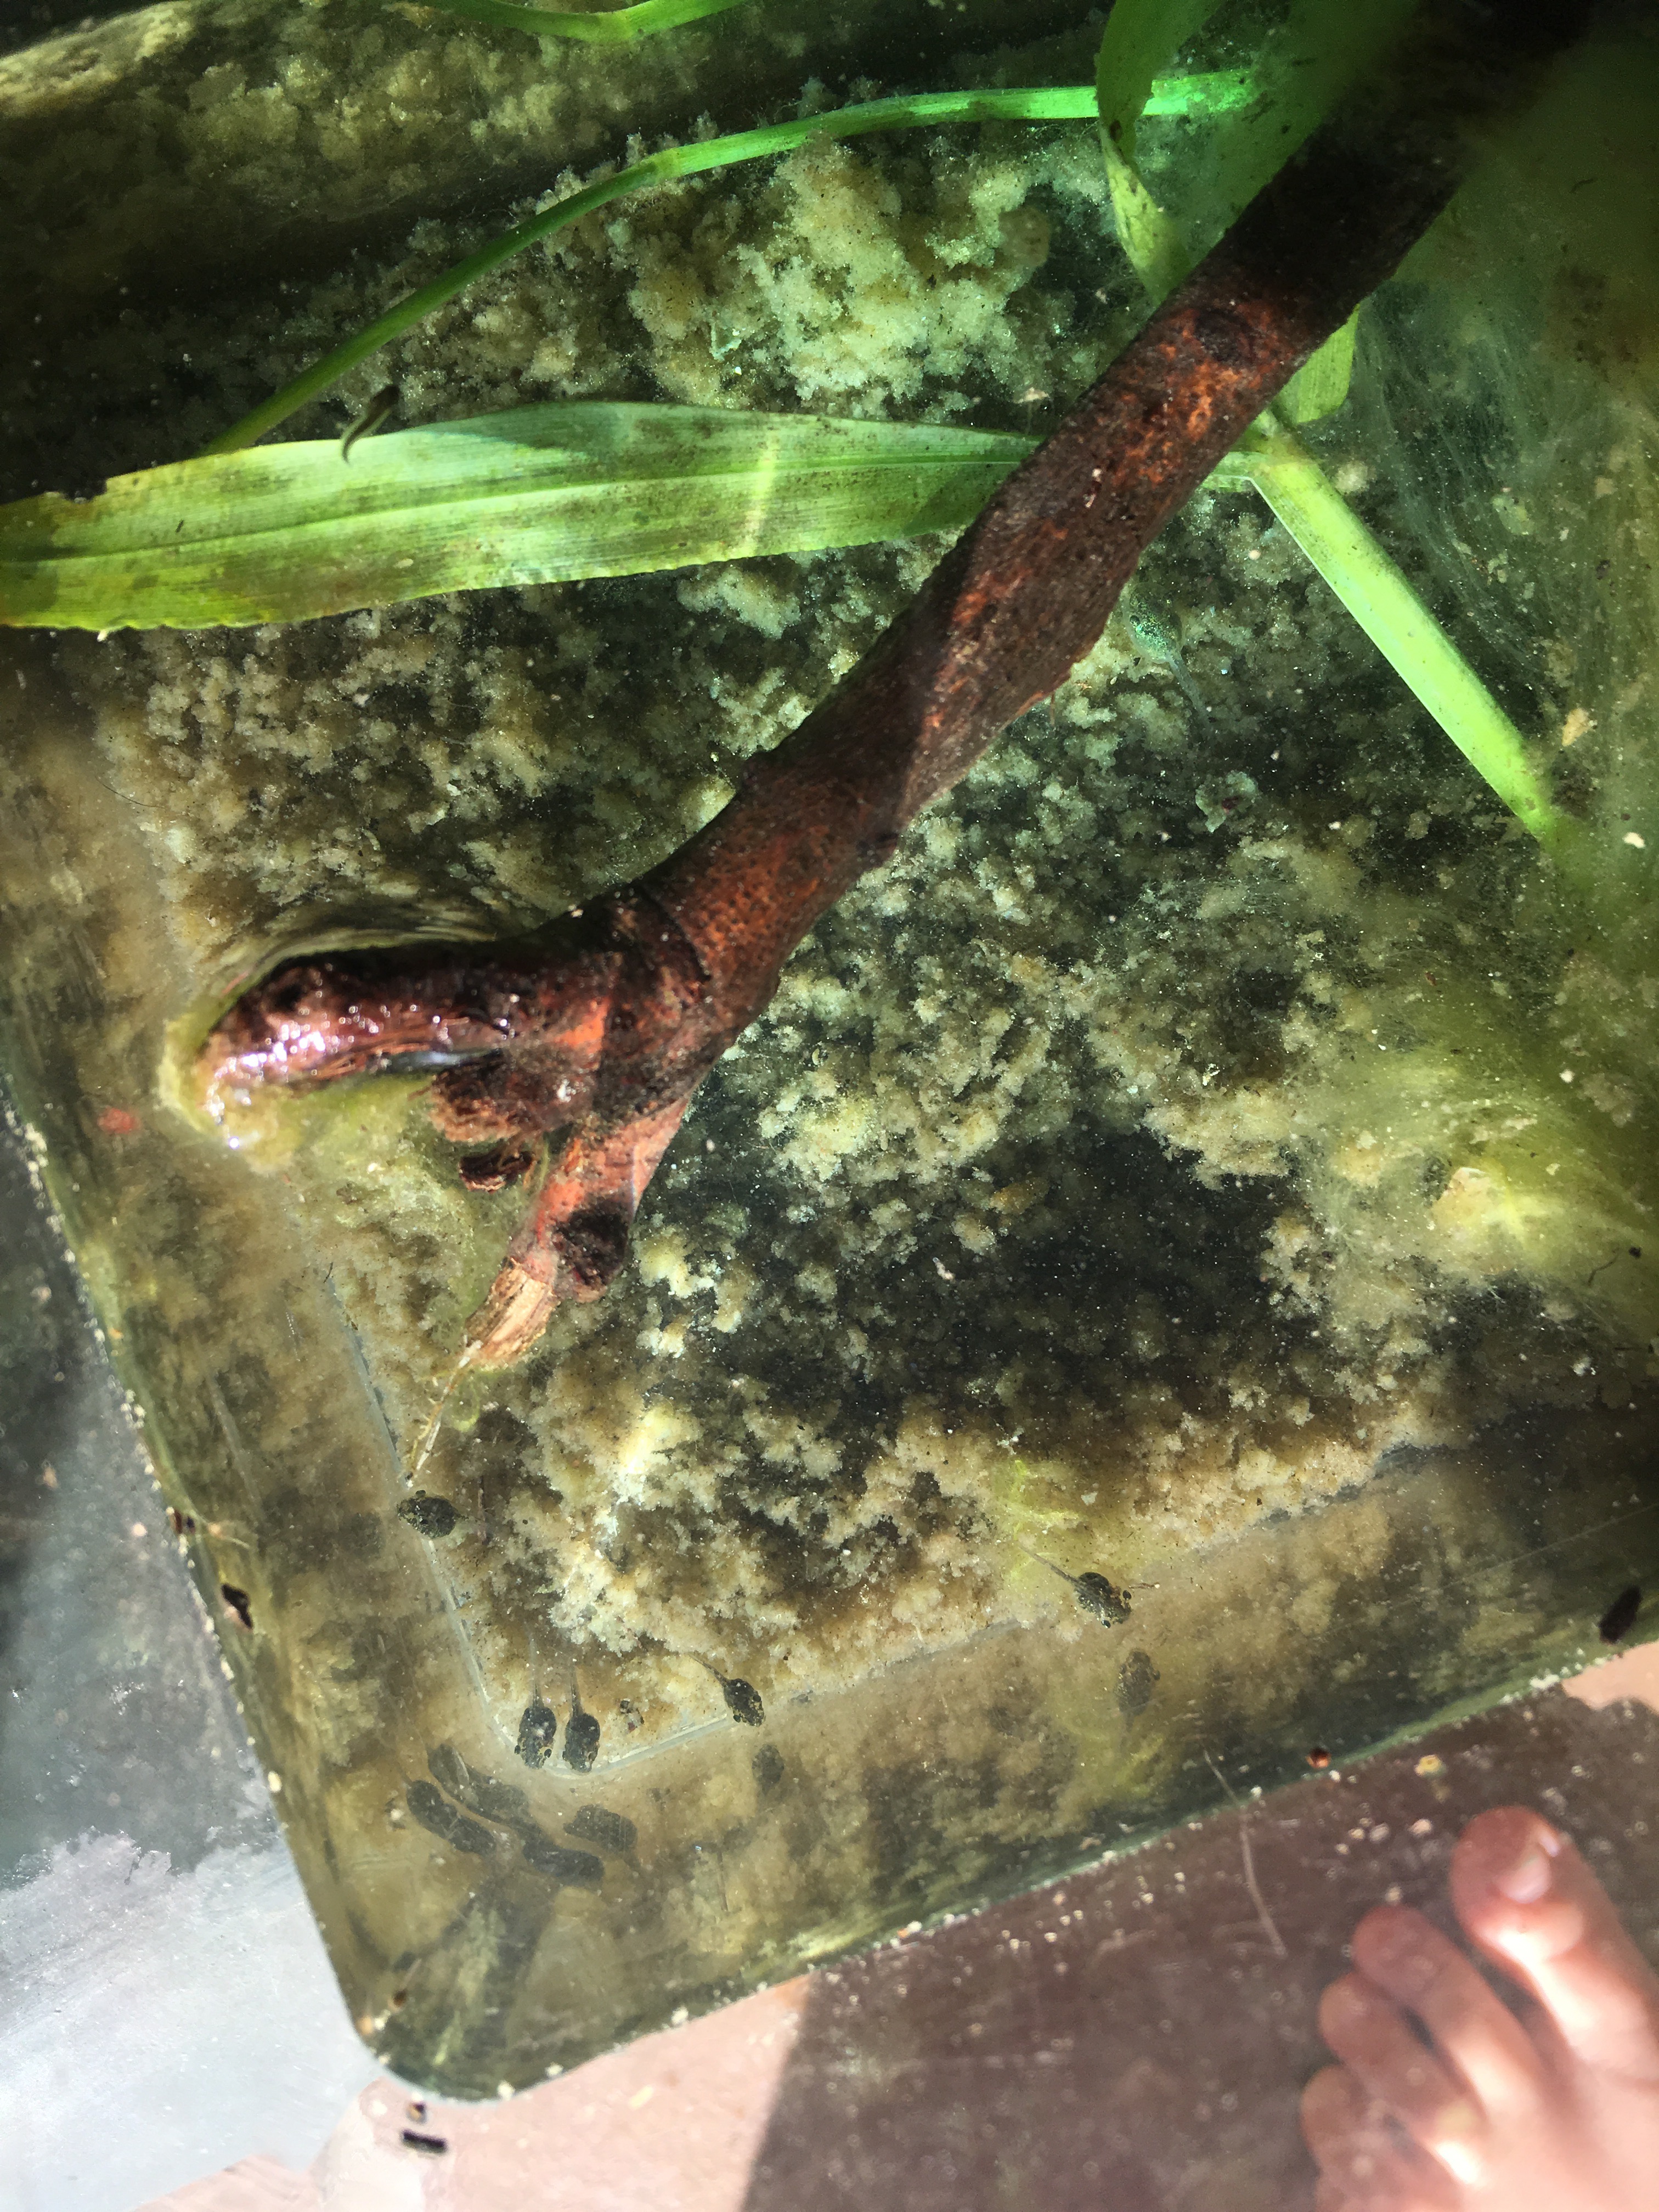
 We’ll keep the little guys in our habitat to watch them grow into polliwogs, then let them go in the pond in the hope that some of them will hang around, or come back to us next spring.

My daughter the donut

  
My middle daughter just performed in her kindergarten play – an adaptation of the book The Big Orange Splot. She was in the cupcake house, where everyone had a sweet tooth, and decided she wanted to dress like a donut. I loved the idea and immediately started trying to figure out how to make it happen. She had lots of good ideas, the best one being that the costume be made of an inflatable swim ring with fabric cover to make it look like a donut. She also wanted donut bracelets. So I broke out the brown and gold polar fleece I bought for something years ago, and set about tracing the swim ring and drawing a donut bracelet pattern. 

 I serged the outside edges together, then turned it right side out and blanket stitched the inner circle together, leaving a spot for stuffing and then stitching up the rest of the way! I did the same with the big donut, but stitched it shut directly around the swim ring, making a slit for the inflation valve to poke out. 

 I hand-stitched on straps she could tie halter-style around her neck to keep it from slipping off.  


We cut a bunch of multi-colored felt “sprinkles”, which i thought would naturally cling to the fleece. 

  I was wrong and they came flying off when she danced, causing a bit of a distraction for the other kids- live and learn! 

All of the children were comfortable and happy on stage, and the show was so charming and sweet. The teachers did a beautiful job of making the kids feel supported, and the children obviously had fun and worked hard to learn their lines and dances by heart. A second-grade friend was outside to congratulate my daughter after the show- hurrah! 


Birthday Fudge

  
In addition to our ugly cheesecake for my daughter’s family birthday, there was a need for treats to distribute at her school birthday celebration. She has classmates with nut, wheat, and egg allergies, and I wanted to make something the most children could enjoy. So we decided on nut-free, easy chocolate fudge, with sprinkles, of course!

Easy Fudge

  1. 1, 14oz can sweetened, condensed milk(I used the organic stuff from TJ’s-annoyingly seasonal so I stock up when they have it around Thanksgiving)
  2. 3 cups chocolate chips(or peanut butter chips or butterscotch or white chocolate, as you like)
  3. Pinch salt 
  4. 2 tsp vanilla extract
  5. Optional toppings 

Mix chocolate chips, milk, and salt together and melt over a stove, or in 30 minute increments in the microwave, stirring until smooth and glossy. Pour into a 8 or 9″ pan lined with parchment paper. Smooth into an even thickness. Add sprinkles or other toppings while still warm and soft.  

 Place in refrigerator until solid, cut into pieces with a sharp knife or pizza cutter. 

Keep chilled until you serve it to a bunch of happy kids! 


Ugly Cakes and Handmade Gifts

My firstborn just turned 8! In our house that means an ugly (but delicious, I swear) homemade cake and a breakfast birthday party. My daughter requested a cheesecake, which I’ve never made before. I used this recipe, but with organic ingredients, and subbing cherry pie filling for raspberries on top. True to form, it came out of the oven ugly! 

 And got even uglier after removing the springform pan rim and chilling 

We prettied it up a teeny bit with cherry pie filling and candles on top 


Once it was sliced and on plates, no one cared how it looked!  

My daughter’s big gift was an American Girl doll that we gave her as soon as it arrived in the mail last week, but I still wanted her to have a few things to open on her actual birthday. Last night I made her a simple wrap skirt out of fabric we dyed last summer, and a matching one for her doll, who she has named Alexandra. 


One Hundred Bunnies

Today is my middle daughter’s 100th day of kindergarten. Of course we had plenty of notice about their 100th day celebration, to which each child brings a collection of 100 objects, but didn’t get started on hers until last night. Project 100 bunnies(origami ones, that is). Thankfully I stockpile pretty paper every time I visit Daiso, and I know the steps of an origami bunny by heart. Double good fortune: my second-grader decided to lend a hand and learned how to make them too! 

 Where we left off last night… 

 This is what 88 bunnies looks like 

 Folding bunny 100!

I made a little photo tutorial if you would like to make some bunnies too. Easter is right around the corner, after all!

Step 1: fold to make a triangle and unfold, repeat to make two diagonal folds   


Step 2

Fold in half to make a rectangle, unfold and repeat to make two more creases 


Step 3 is a bit fiddly- the photos explain better than words, but start with folding a triangle, and pinching where all the creases meet in the center, then fold that into a double-layered triangle. 


Step 4- fold the point of one layer up to meet the center point of the triangle, and repeat 

   
Step 5 I’ll let the photos speak!   

 Step 6: Use these folds to make little pockets- observe 


Step 7: Flip over and observe 


Magic Health Elixir

This flu season has been rough, health-wise for my usually hardy kids- intestinal bugs, an ear infection, sore throats, runny noses, and the cough that won’t quit. I like to have a jar of this on hand for soothing sore throats and clearing coughs and sinuses. This is by no means my idea, but in case you haven’t tried it- lemon, ginger, honey tea syrup!   

   Lemon, Ginger, Honey Elixir

  1. 2-3 lemons
  2. 4-5 inch ginger root, peeled
  3. 1-2 cups honey(raw and local are ideal

Slice your lemons and ginger into thin circles and take turns layering in jar 

When jar is full almost to the top with layered lemon and ginger, slowly pour honey over, allowing it to drizzle down between the layers and fill all the empty space. 

 
 Cover and refrigerate for up to two months(if it lasts that long!). Scoop out a big spoonful and stir into a mug of hot water for soothing tea, or take a teaspoonful of just the syrup to coat a sore throat or help a persistent cough. I shouldn’t have to tell any moms out there never to give honey to an infant under 12 months, right?

Doh!

I stopped buying play doh 4 years ago, in favor of homemade no-cook doh. Mostly because of how expensive those little canisters are relative to how quickly kids mix the rainbow colors to greige and leave it to turn into sharp little crumbles on the ground. My son(not coincidentally 4 years old) found an ancient tiny canister of yellow play doh and was fascinated by the bright color and smooth (if rubbery with age) consistency. He asked for more, which inspired me to try the cooked play doh recipe on Tinkerlab. We had a weavil-infested bag of flour in the freezer for just such a purpose, and I buy salt and cream of tartar in bulk at The Berkeley Bowl for similar reasons!

 
We mixed it all together off the stove.  

 Then we stirred and stirred and stirred, and once it broke my old wooden spoon in half(seriously) I knew it was probably the right consistency, and plopped it onto a sheet of waxed paper for kneading. 

 I divided it into four balls and kneaded in food coloring and a drop of lavender essential oil for yummy smell(which I wouldn’t do if my kids hadn’t encountered it before, or if they were doing the initial knead, as undiluted it can be a skin irritant!) 

 It turned out pastel, and I suspect gel food coloring or liquid water colors might give more vibrant hues 

 All of the kids, except the very smallest, had a blast, and so did I. I don’t think you ever really get too old for Play Doh


Super Yummy Slow Cooker Pork

I love my slow cooker for one thing: golden bone broth or stock made with a chicken carcass and veggie scraps. I keep wanting to find other things that are equally good, but the slow cooker chili and bean soup recipes don’t appeal at all. When I saw this Momofuku Pork recipe, I realized right away it could be adapted to the slow cooker. The result was, according to my eldest daughter, “the best pork I’ve ever had!” We had it plain with sides of asparagus and green beans, but it would be great on a chopped salad, in a wrap, tossed into soup…the only mistake I made was not getting a big enough piece of meat!

Slow Cooker Pork

  1. 1 pork shoulder roast, 3-5 lbs
  2. 1T salt per pound
  3. 1T sugar per pound

Rub pork with salt and pepper, wrap with plastic and let rest in fridge at least 8 hours 

 After rest, place roast and accumulated juices in slow cooker, cover and place on low for 7 hours  
 While still in slow cooker, use two forks to gently shred meat.  

 Cover and reset to high for an additional hour to cook down juices and carmelize the meat a bit(you can also spread out on a pan and broil for 15 minutes for color). Devour!

Breakfast for Days

I love to cook and bake, but I also like to do other stuff(like knit and sleep), so when I make something that takes a bit of effort and mess, I like it to last for more than one meal. Waffles are a case in point: always delicious, always a hit, but a bit more time consuming than buttered toast. Enter my favorite kitchen tool the Cuisinart Griddler which makes the best grilled steak and chicken tenders indoors, and with the optional waffle plates makes  multiple waffles at once a snap. I use Martha’s recipe and add a scoop or two of vanilla whey protein powder to give them a bit more nutritional oomph  

Of course the batter makes a giant stack even my gang can’t get through in one meal, so I stack them up, separated by waxed paper, then wrap in foil and freeze. Super easy to throw in the toaster anytime. 

We also like bacon, but I can’t be standing over the darn pan flipping and watching. Meet my friend oven-cooked bacon: 

 Line a rimmed baking sheet with heavy duty foil and lay out your bacon. Heat your oven to 400 and pop the bacon in. Check and rotate your pan after 10 minutes. Assess done-ness and give another 5 if not crispy enough, repeat in 5-minute increments until done to your liking, and drain on paper-towel-lined plates. I cook the entire package, and like the waffles, I wrap the leftovers, refrigerate and then crisp in the toaster oven for another meal. Yum!

Hanging With Permie Poppins

Around the corner from the magical preschool my son attends, and my older daughters graduated from, there is a hillside permaculture paradise. At this Hillside Homestead, their former garden teacher Allison provides amazing small group garden sessions, full of mud and digging and picking and eating and making natural dyes and feeding goats and other wonders I couldn’t have imagined growing up as a city child. My son goes twice a week after school, and my daughters had a chance to spend the morning there with a friend who also has the week off. They made the very most of it! Allison is wonderful about sharing photos and videos of their adventures, the first photo is hers:  
 We always send extra clothes because thanks to the winter rain there is serious mud play to be had.

There’s also a giant African tortoise named Kitty across the street who we joined Allison to visit and feed after pick up  


Of course we had to wash our hands after tortoise petting, so Allison taught us about this amazing California native tree whose blossoms act like soap and make cleansing lather when mixed with water and friction.


  Knowing Allison (aka Permie Poppins) is a gift for both my children and me- she is so generous with her copious knowledge about flora and fauna. Not to mention the bounty from the hillside garden where she teaches- the source of my rhubarb and many other local fruit and veggie treasures. Today she sent us home with gorgeous chard and a rooted rose geranium my eldest daughter planted in her garden(to give it he best chance for survival!). And my lucky little fellow gets to go tomorrow!